Whatever the scenario is, we ought to take screenshots both in the mobiles and the PC as a part of our routine. Taking a screenshot in the mobile is much simpler than in the PC, which includes screenshot of the whole screen, screenshot of a particular window, screenshot of a particular portion of the screen. The general drill to take a screenshot in PC is to press Prt Scr button and Ctrl+V in the paint. But this method only serves the purpose of taking the whole screen. Hence, we provide our readers with various other methods to take a screenshot without using Prt Scr button.
Table of Contents
Taking screenshot on PC/Laptop without using Print Screen Button
Method 1: Using Snipping tool
Snipping tool is very effective and becomes really handy when our requirement isn’t just the snap of the whole screen. This is available in Vista onward windows versions like windows 7,8,8.1,10. Search for “snipping tool” in the windows search bar to access it. Using snipping tool we can
- Take Full-Screen Snip.
- Take Free-form Snip.
- Take Rectangular Snip.
- Window Snip.
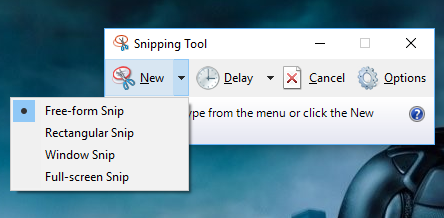
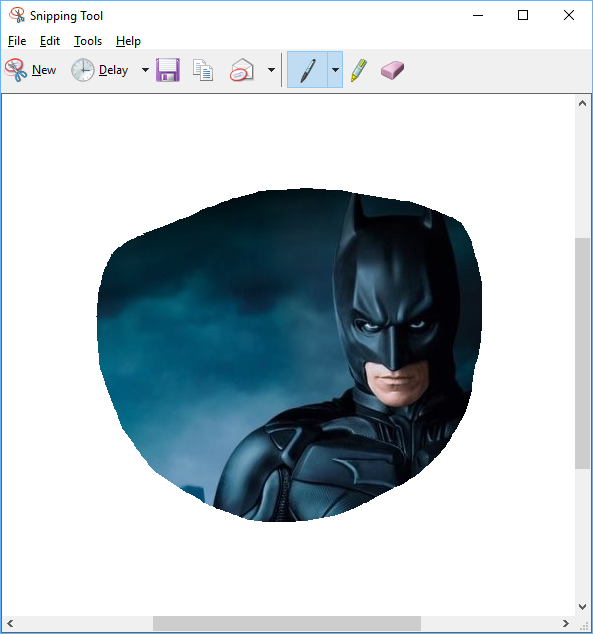
- Free-form snip allows you to snip any part of the screen in any desired shape.
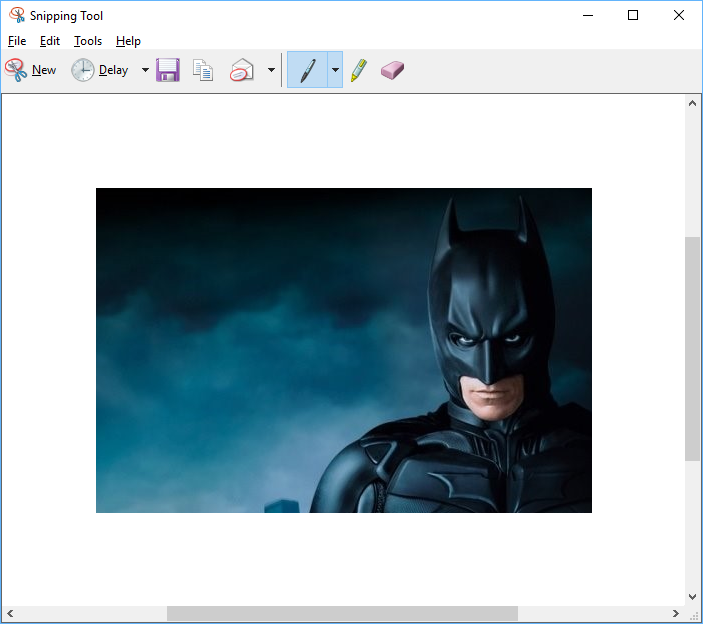
- Rectangular Snip can be used to snip any rectangular portion of the screen.
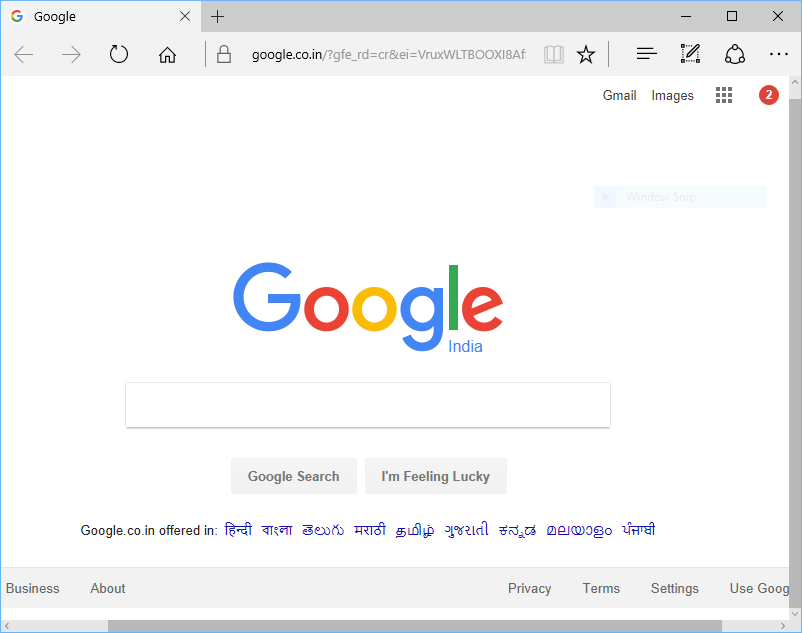
- Window Snip can be used to capture a particular window of which you need take the screenshot of.
The figure shows the snip of the Microsoft edge.
Method 2: Directly into MS Office Documents (Office 2010 and above)
Consider a situation where we need to attach screen shots into word documents or other MS Office Documents. In general, many of us just take screenshot using Prt Scr button or the snipping tool and save it on the drive which is later inserted into these documents. We are providing you the easiest way to bypass this procedure and directly inserting the screenshot into the document. To avail this procedure we need to have office 2010 or above installed on our PC. You can find this option in the insert section of any MS office document.
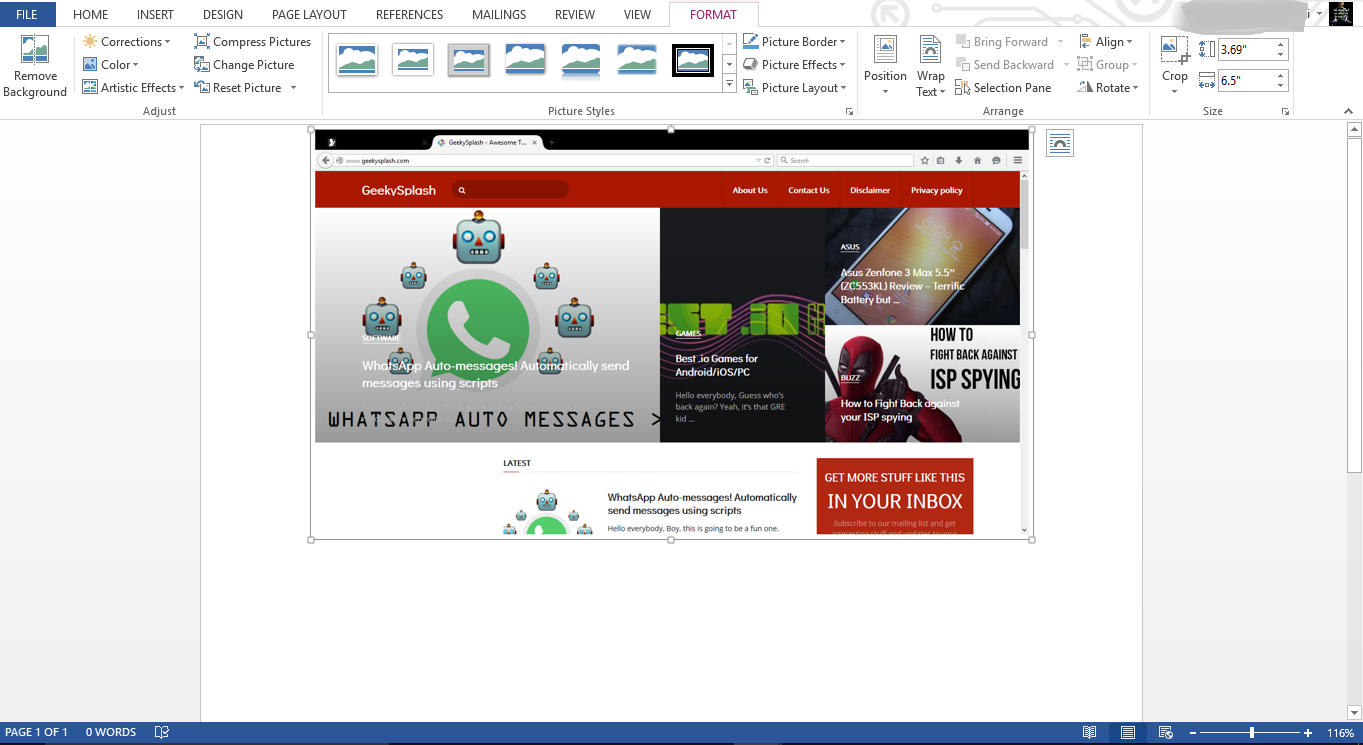
Here we again have options to clip the screen (A rectangular snip just like in snipping tool) and also to directly insert the screen shot of the desired window which are shown in “Available Windows” section once we open the screenshot button in MS Word 2013 as shown in the below figure.

- Screen Clipping can facilitate you to clip the rectangular part of the screen as shown in the picture.
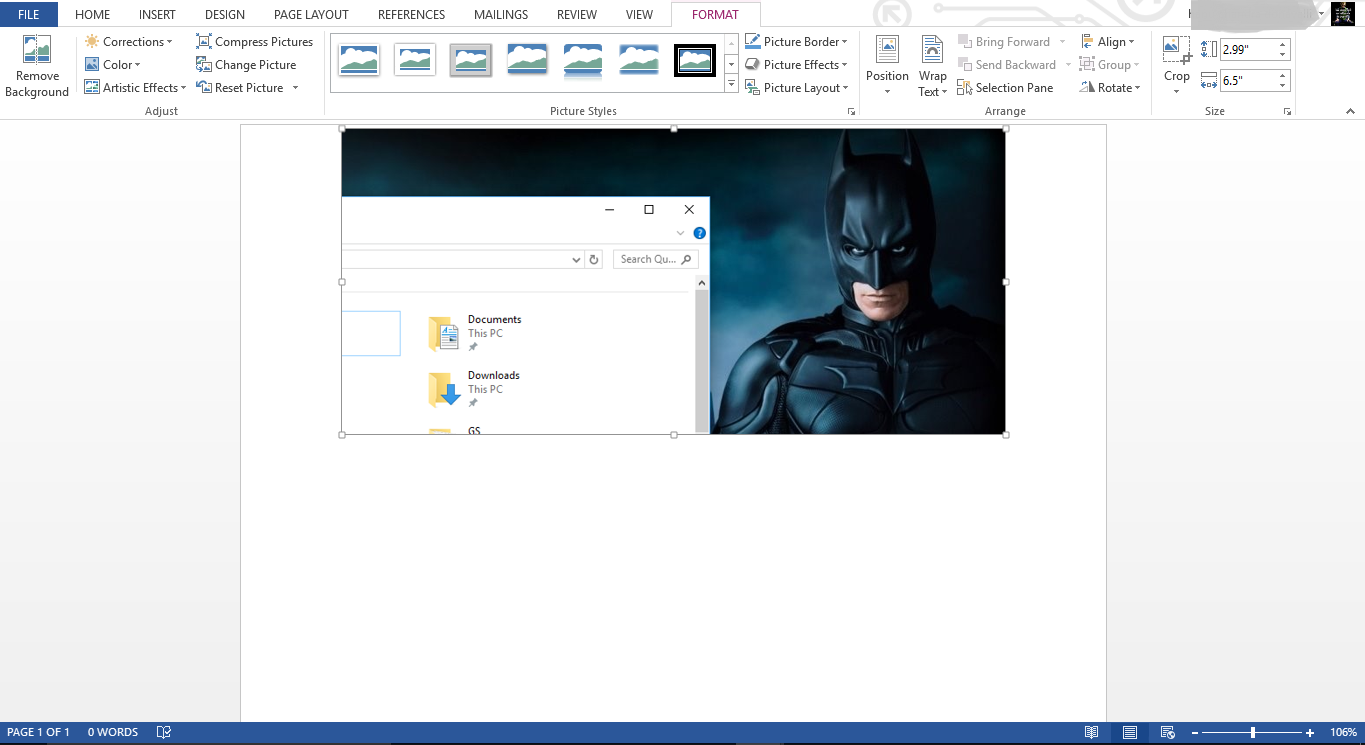
- We can also avail the screen shot of the particular window by choosing from the available Windows.
In the figure, I selected the “Firefox” window from the “Available Windows”.
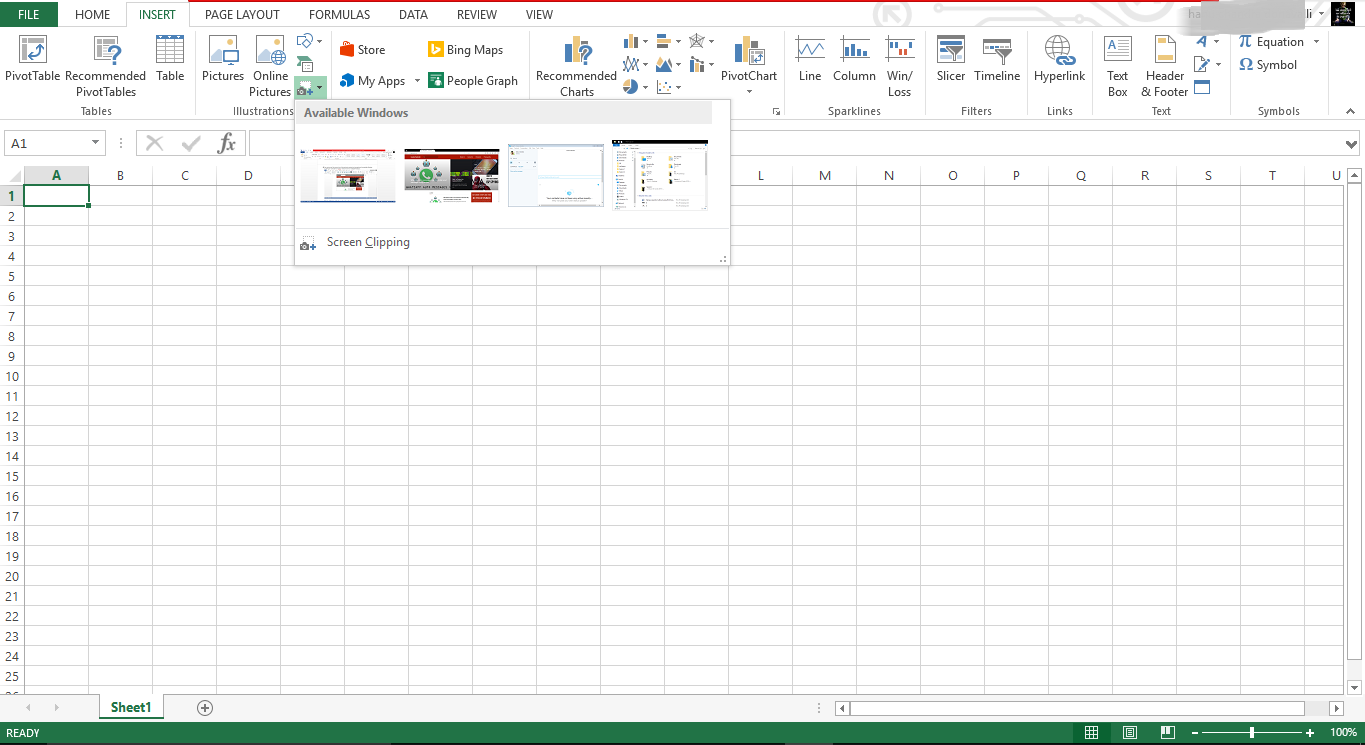
- Screenshot option in Microsoft Excel:
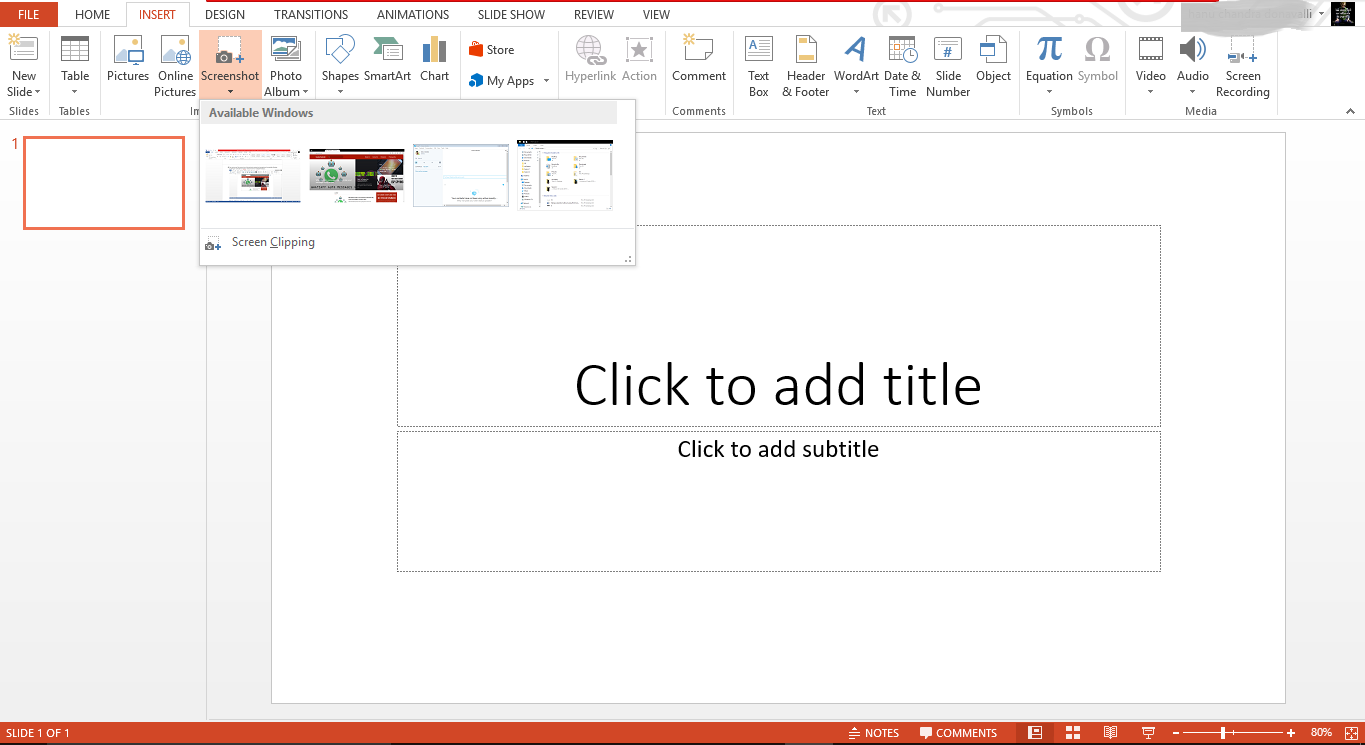
- Screenshot option in Microsoft Power Point:
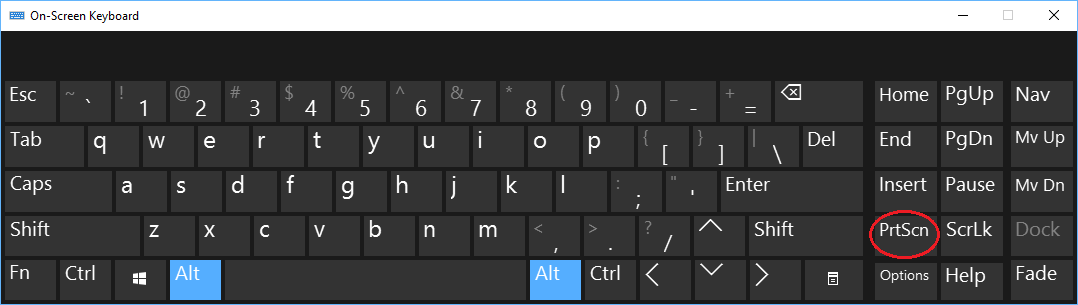
Method 3: Using On-Screen Keyboard
This might be a bit silly :p but I am including as this way of taking a screenshot doesn’t involve using Prt Scr button from the keyboard. This is a useful technique for the people who has a keyboard with damaged “PrtScn” button.
Step 1: Search for On-Screen Keyboard from in the Windows Search bar.
Step 2: Click the PrtScn button on the on-screen keyboard and then close the on-screen keyboard.
Step 3: Open Paint and Press “ Ctrl+V” to paste the screenshot and save the file in the desired folder.
Taking screenshot without using Print Screen Button
That winds up our post. We suppose there are many other ways to take screenshots without using the keyboard, but these methods are the easiest and dare we say, the most effective. Using the keyboard to take a screenshot is, for the lack of a better word, outdated, and we believe it’s high-time for an update. So we really hope this post serves you well, and that you will implement these methods. As always, share/comment/like if you’ve found this post useful, and keep your eyes on this space cause we have a lot of interesting posts coming up! Until then, peace.
Loading…